CFMRI Calpendo User Guide
Introduction
As part of our ongoing effort to improve your experience with booking and using CFMRI resources, we have transitioned to a new scheduling system called CFMRI Calpendo.
Before utilizing CFMRI CALPENDO, please review this document which covers:
- User Registration
- User Login
- For PIs
- - How to Submit a New Project
- - Project Code
- - Finding Projects
- - Project Membership
- For Operators/Research Coordinators
- - How to Create a New Booking
- - How to Modify a Booking
- - How to Cancel a Booking
- - How to Enter a Project Code
- Reporting a Technical Problem
- - What problems should I report?
- - How are reported problems addressed?
- - How to Report a Problem
- FAQs
- - What are the lost hours and how do I avoid them?
- - How do I check my project's pilot hour balance? *New*
- References
User Registration
To request a user account:
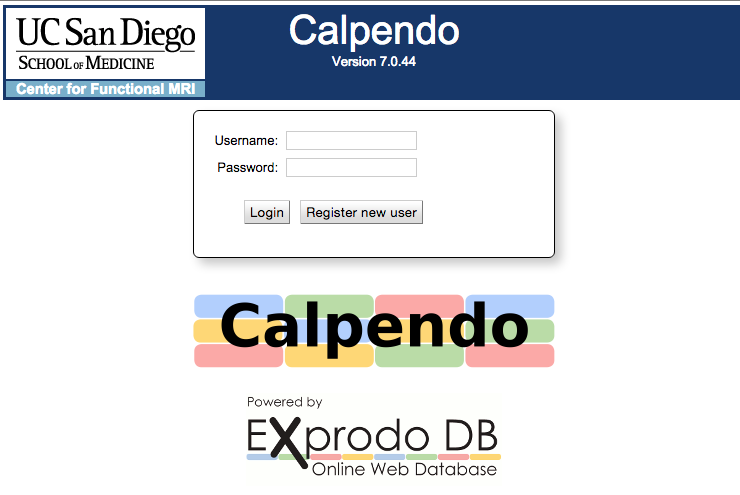
- Go to this link - https://cfmri.calpendo.com When CFMRI CALPENDO is started, the opening screen will look like this.
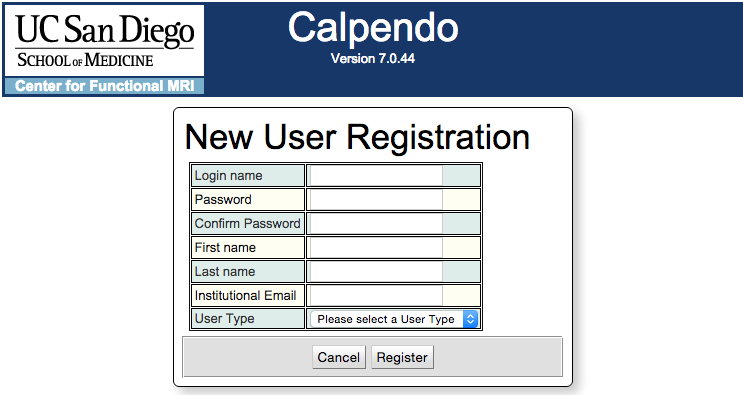
- Press the Register new user button to see the New User Registration form shown below.
- Fill out all fields.
- Login name is the first part of your Institutional Email (e.g. ddshin if email address is ddshin@ucsd.edu) and all lowercase letters and numbers.
- Password should be minimum 6 characters.
- Select User Type pertinent to your role - see the table below).
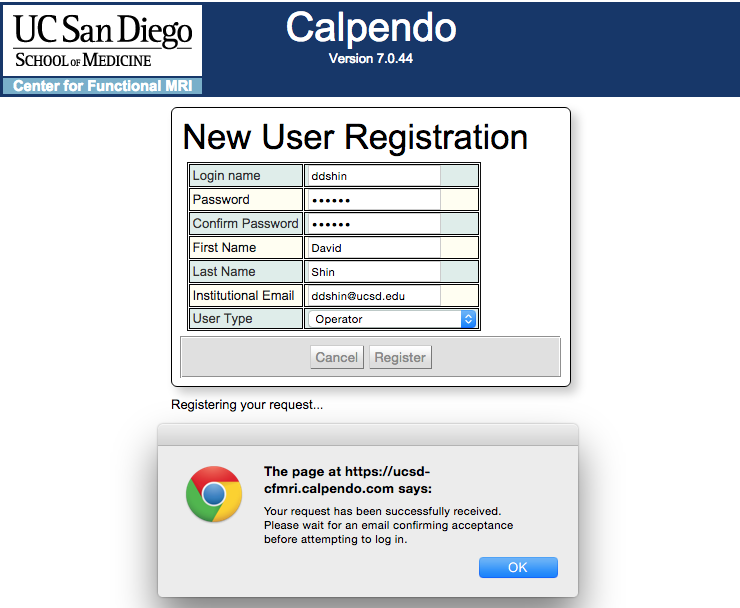
- If the requested login name, password and email address are acceptable, then a message like this will appear:
- Once your registration request is submitted, the CFMRI User Approval Team will review your request and send you an approval email.
User Type |
Role |
PI |
PI on an ongoing project or new project at CFMRI. |
Operator |
CFMRI current certified operator. |
Research Coordinator |
Research Coordinators are associated with one or more projects and are involved with creating bookings on CFMRI resources (e.g. 3Ts, 7T, Exam Rooms, Parking, etc.) but are not operator certified. |
Operator Trainee |
Operator Trainees have attended the safety lecture, passed the safety quiz and have an approval on file at CFMRI from their PI requesting that they be operator trained. |
User Login
To Login to CFMRI Calepndo (most popular web browsers can be used except Internet Explorer):
- Go to this link - https://cfmri.calpendo.com When CFMRI CALPENDO is started, the opening screen will look like this.
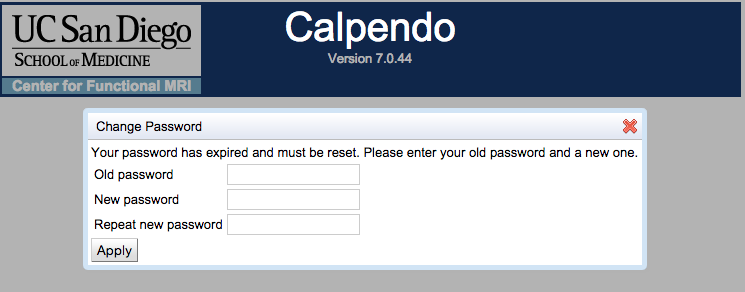
- Insert the Username and temporary password you received in the email from CFMRI.
- You will be prompted to change your password (minimum 6 characters) and will see a screen like this.
- Press the Apply button to change your password.
For PIs
How to Create a New Project
- PIs must have an active User ID before they can create a new project. If you do not have an ID, please refer to the User Registration Section above.
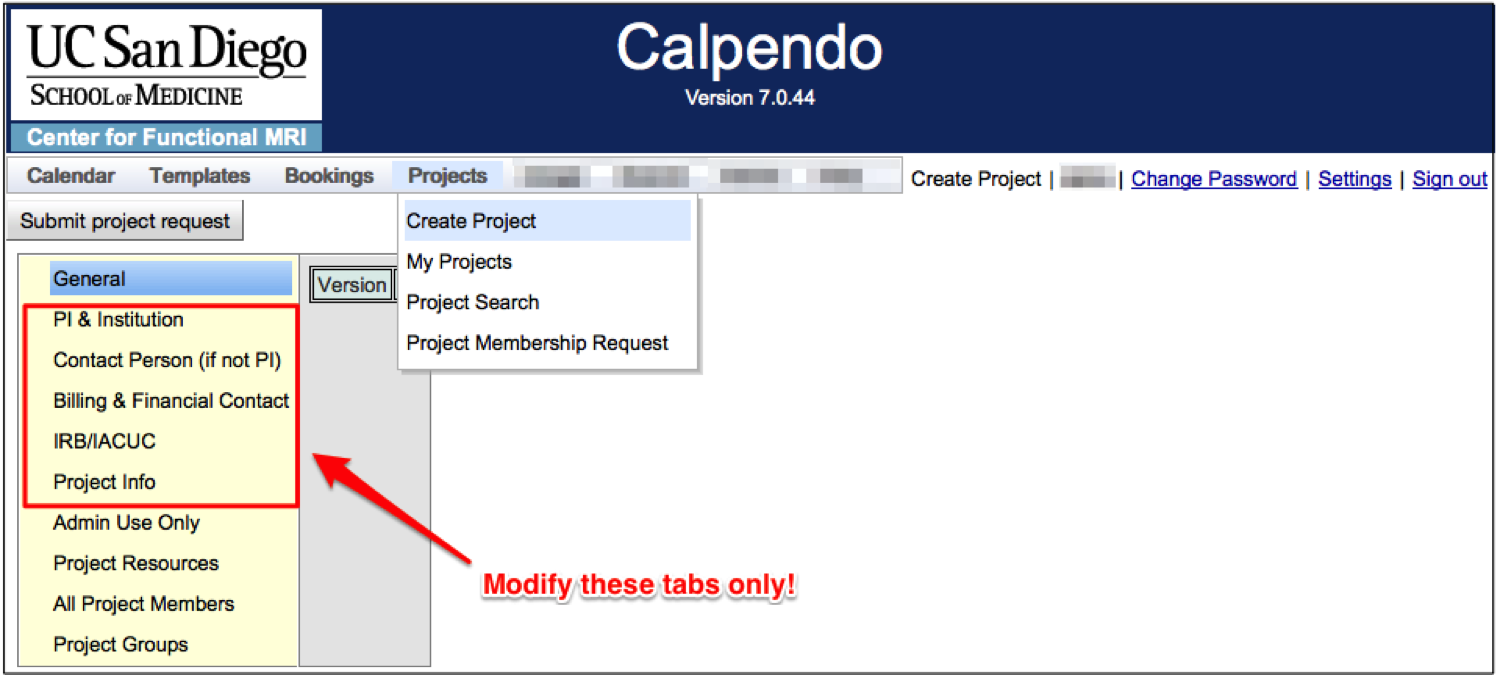
- Login into CFMRI Calpendo and click Projects/Create Project on the main menu (figure below).
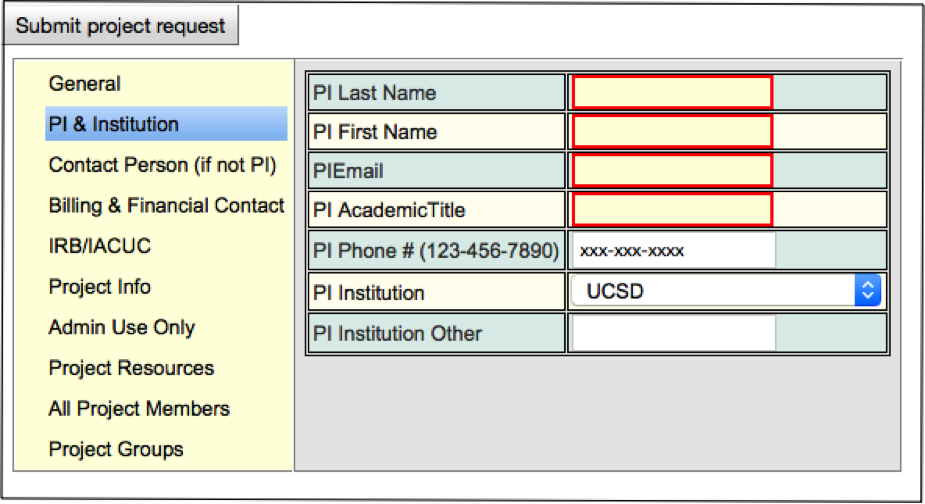
- The project creation page has several tabs in the left column. See Red Box under General (below). Enter relevant information under the following tabs:
- PI and Institution
- Contact Person (if not PI)
- Billing and Financial Contact
- IRB/IACUC
- Project Info
- Once the relevant information has been filled in, press the Submit project request button. If there are problems filling out the project creation form, please contact cfmri@ucsd.edu.
- You will receive an email confirming that your requested project has been submitted for review and a further email when your project is approved.
N.B. For the Project Full Title and Abbreviated Title, please do not include sensitive information that you do not wish to share with other CALPENDO users.
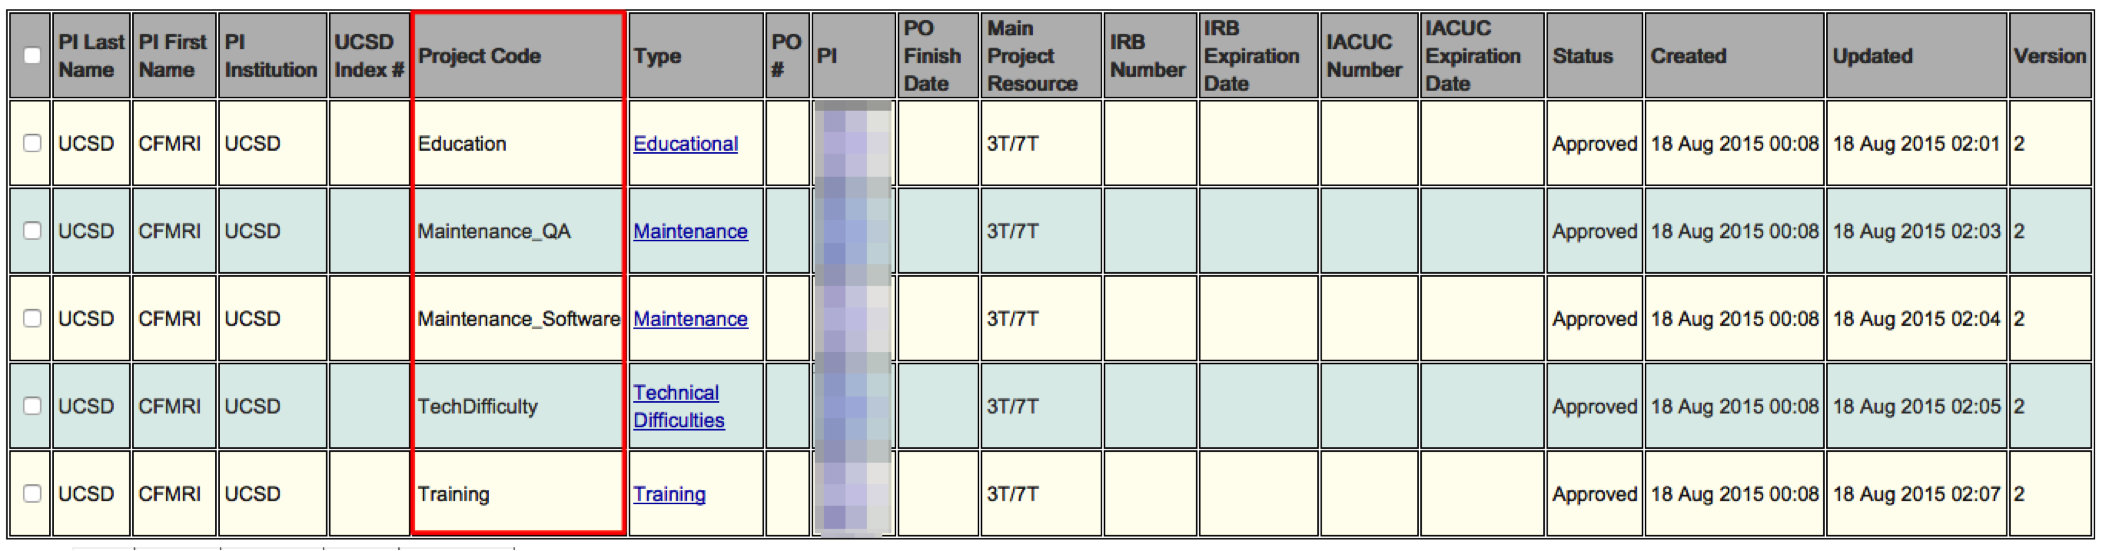
Project Code
- Each
project will be assigned a unique Project Code by CFMRI following
project approval. Typically, Project Codes consist of the PIs Last
Name_Abbreviated Project Title (e.g. Shin_SampleProj).
- For existing projects the Project Code closely mirrors what was in the old Webschedule system.
Finding Projects
- When your projects are approved, you can find them by logging into CFMRI CALPENDO.
- Click on Projects/My Projects (see below).
Project Membership
- To add Operators/Research Coordinators/Operator Trainees to a specific project, PIs can provide the person with the project code and he/she will be able to request project membership by entering the code when logged into the system. (See 'How to Enter Project Code to be Associated with a Project' below).
For Operators/Research Coordinators
Booking time on CFMRI resources is the primary function of the new system. Unlike the previous system where you logged into each resource separately, you can now view schedules and make bookings for all resources with a single login.
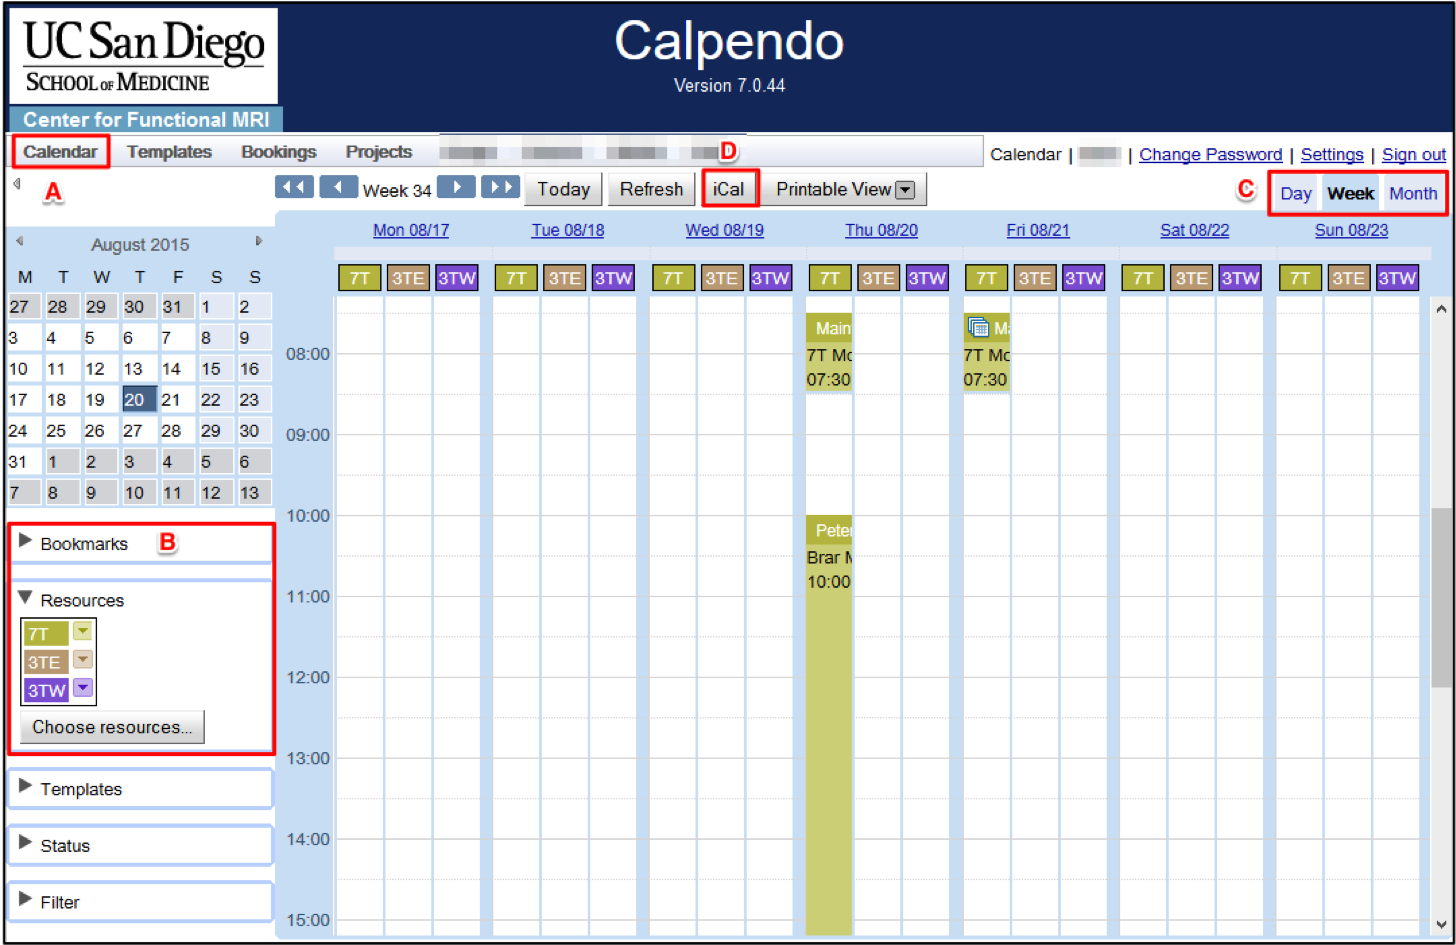
How to Create a New Booking
- Once logged in, click Calendar on the main menu (see A in figure below). You can display calendars for multiple resources by either going to Bookmarks or Resources (see B). You can also change the calendar view between Day, Week and Month (see C).
- The iCal button (see D) can be used to to feed bookings directly to most calendar applications e.g. Google, Outlook, etc. This feature is useful for checking up-to-date resource availabilities on your phone.
- To Create a booking on the calendar, navigate to the date that the booking needs to appear on. Make sure the mouse cursor is on the right resource. Click directly on the calendar where the resource has availability.
- The New Booking window will pop up as shown below. For all
bookings, leave the 'Repeat' field to 'No repeat' and the 'Status'
field to 'Best possible'.
- Check that you have selected the correct Resource.
- Select the correct Project. If you enter a few letters of the project name the system will autofill the project field.
- Select the time for using the resource.
- Reminders – set the notice period for reminder emails and who to send them to (Booker, Designated Operator, project PI and/or all members associated with the project).
- Select appropriate Operator for the scan session. Again if you enter the name of the operator (first or last name) the system will autocomplete the field.
- If the designated operator’s status is not current, the system may prevent you from creating a booking. If this occurs, you can select another operator associated with the project and you will be guided to contact cfmri@ucsd.edu.
- Add a short description for the booking. Please do not include sensitive information (e.g. condition of the subject, demographics information) in the booking description!
- Most projects will be using paid hours so only select Use Pilot Hours (Yes) if you have a Pilot Hour account with usable hours in it.
- Click Create Booking.

How to Modify a Booking
- Once a booking is created, you can edit the booking properties if your scan session hasn't started. You can also retrospectively modify the booking properties up to 24 hours after the session ended. This feature is particularly useful if your scan lasted longer than initially planned. In this case, you can go back and modify the booking end time to refelct the true duration of your scan. The editable past bookings can be easily identified on the calendar. On the 3TE, 3TW, and 7T calendars, the background color for the modifiable bookings is white (as opposted to red).
- To edit the booking, find your booking on the calendar, click 'Edit', and change the properties you want.
Booking properties you can change include:
- Scan end time (new booking duration must be longer than the original duration)
- Booking email reminder
- Designated operator
- Booking description
- Click 'Update Booking' to save your changes.
How to Cancel a Booking
- You can cancel your booking anytime prior to the start of your session. However, please keep in mind that cancelling a booking may be subjected to cancellation penalty according to the CFMRI policy.
- To cancel a booking, find the booking on the calendar, click 'Edit', then click 'Cancel Booking' on the booking window. You will be asked to select a reason for cancellation.
- Click 'cancel booking'. You (including the booker, operator, and the PI) will receive an email confirmation that your booking has been cancelled. The email also indicates whether the cancellation was done in time or not.
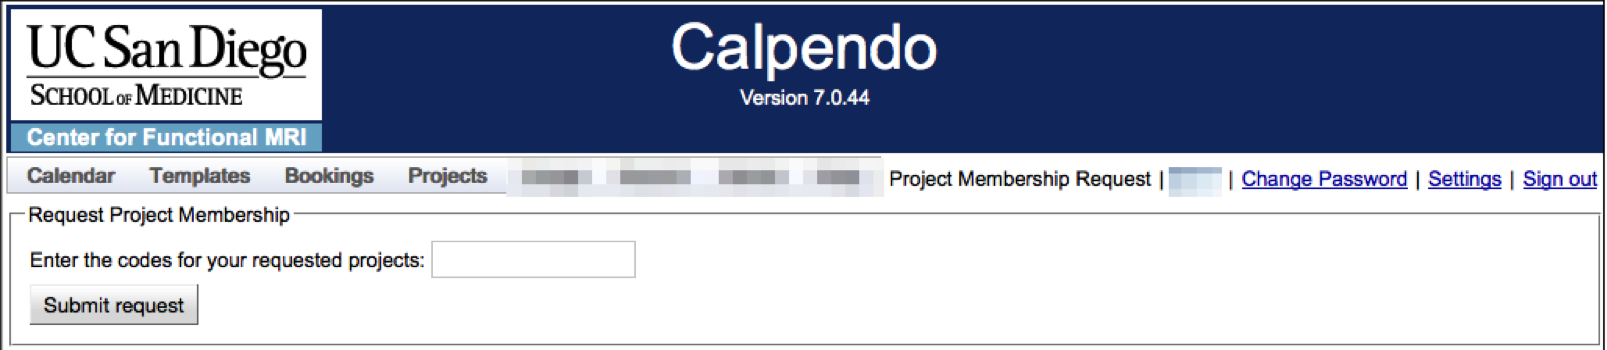
How to Enter a Project Code to be Associated with a Project
- As an Operator, Research Coordinator or Operator Trainee, you have the option to request to be associated with a specific project owned by your PI.
- Ask your PI for the project code, login to your account, then select Projects/Project Membership Request. Enter the project code, then click Submit request (see below).
Reporting a Technical Problem
Using Calpendo, you can check the latest status of the scanners (3TE, 3TW, 7T, and Mock), peripheral equipment, and programs necessary for running your session successfully. By reviewing the Problem Report page, you should be able to decide whether to go ahead with your planned session or cancel it. It is essential that users report both scanner and equipment issues as soon as they are identified using the reporting mechanism described below.
What problems should I report?
- Scanner (including head-coils and patient table) malfunctions and problems with the scanner control GUI.
- Image artifacts. In this case it is critical to report pulse sequence parameters.
- Malfunction of peripheral devices, such as:
- Headphones
- RT intercom
- In-bore intercom
- Bite-bar holders
- Mirrors
- Screens
- Missing Paddings
- Response boxes & joysticks
- Physiological monitoring devices & associated PCs
- Projectors
- Adaptors (such as PS/2-USB converter etc.)
- Eye tracking devices & associated PCs
- TTL pulse triggering cables & TTL pulse extension device
- Problems with the scanner and control rooms (e.g. pneumatic scanner room door lock, oxygen monitor, scanner room sink, etc.).
How are reported problems addressed?
- CFMRI staff are notified immediately when a new problem is reported in Calpendo and will take the necessary steps to resolve the problem as soon as possible. The changing status of the problem (from open to in progress to completed) is reflected in the current problem log (see below). In addition to checking the reported problems, CFMRI staff monitor image quality from our scanners using daily BIRN QA protocol.
How to Report a Problem
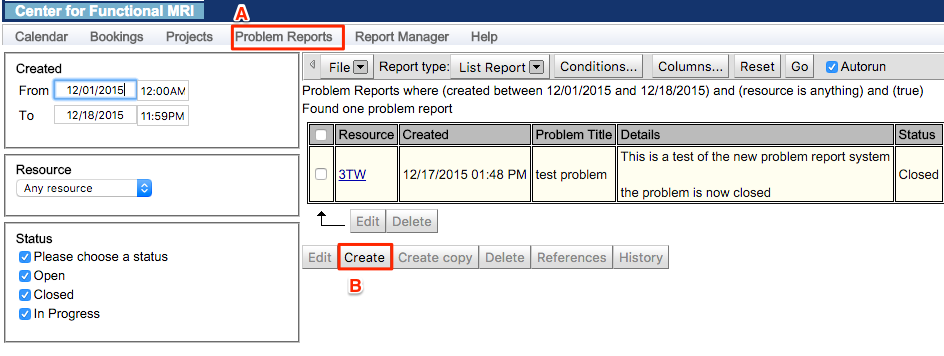
- Click 'Problem Reports' on the main menu (A in figure below). On this page, you can report a new problem as well as review the existing problems. Each problem is classified using associated resource, report date, report title, problem details, and status (Open, Closed, In Progress).
- To create a problem, click 'Create' button (B in figure below).
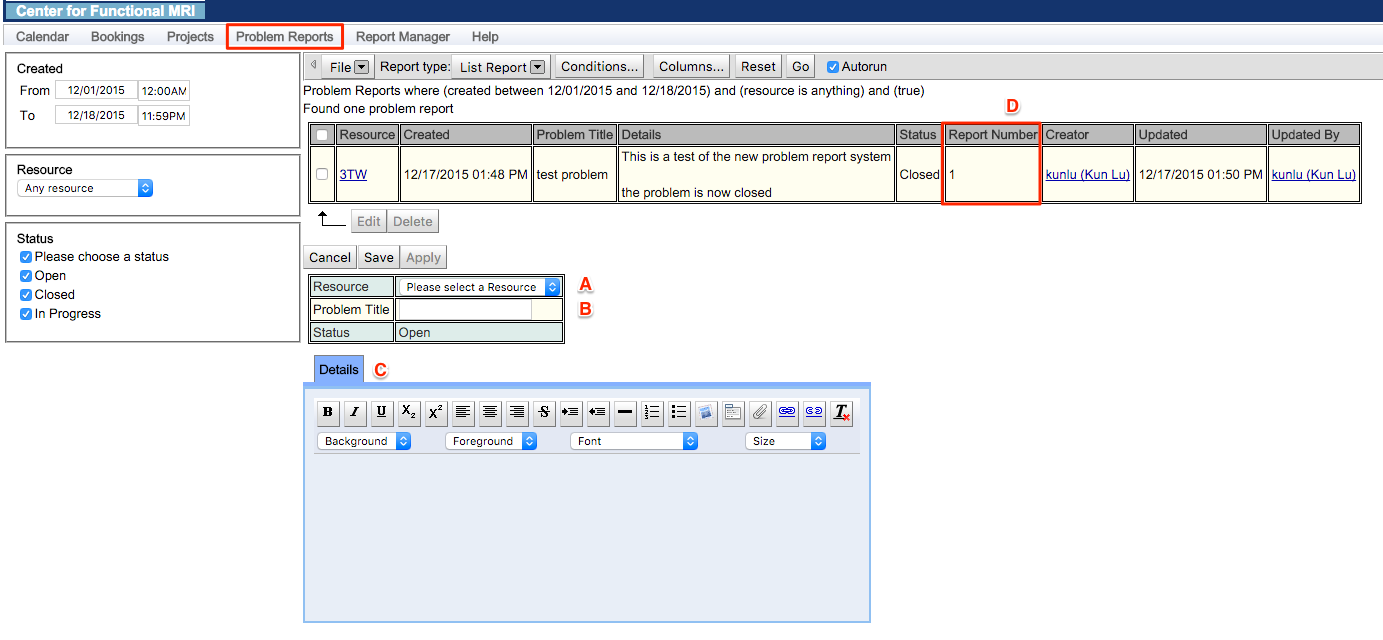
- Additional fields will appear (A, B, C in figure below), which will be used to store problem details.
- Choose the resource associated with your problem (A). At this time, please only report problems associated with 3TE, 3TW, 7T, and Mock scanners.
- Add a problem title (B). Please be brief and concise.
- Add problem details (C). You can use the rich formatting toolbar to take advantage of various formatting options, including the ability to attach images (e.g. screenshots).
- Click 'Save' to submit your report and your problem report will appear in the list. Also note that your entry has a unique report number (D).
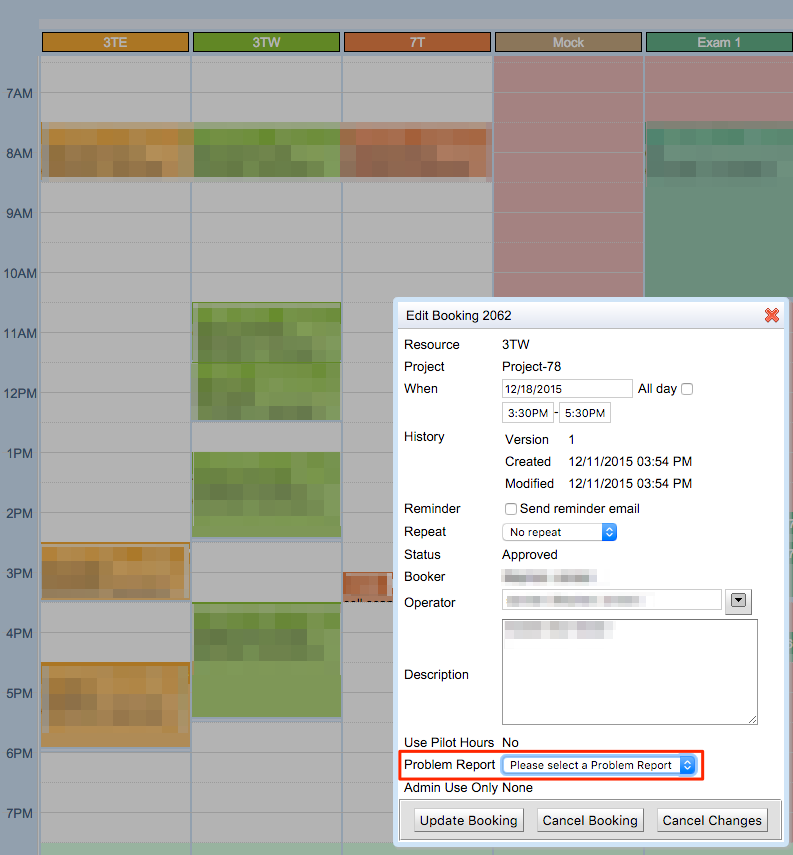
- Important! For billing purposes, it is important for the problem reported above to be associated with your booking. To do this, go back to your booking on the calendar, click 'Edit', and select your report from the 'Problem Report' field (see figure below).
- Click 'Update Booking'.
- You will get an email confirmation that your report has been sent to CFMRI staff.
- You can monitor your problem's status by checking the 'Details' (below your initial report) and 'Status' fields on the main 'Problem Reports' menu.
FAQs
What are the lost hours and how do I avoid them?
Your booked hours become Lost Hours when the associated booking is cancelled under one of the following conditions:
- The booking was cancelled more than 2 hours after the initial booking event
- The cancelled booking was for an event that is less than 30 days away from the cancellation date
The 2-hour clause provides the opportunity for a PI to hold a slot briefly to confirm that it can be used. As long as the PI cancels the slot within 2 hours, the PI will not be responsible for these hours.
The 30-day clause allows PIs to cancel time more than 30 days ahead of the scheduled event without penalty.
Booked hours that are cancelled outside the 2-hr window or within 30-days of the scheduled event will not be refunded and are considered lost.
If your booked hours become Lost Hours, the hours 1) will be billed or 2) the same number of hours will be deducted from the pilot hour balance, unless another PI or project reserves your cancelled slot. Each month, the lost hours not rebooked by another project or PI will be tallied for each project, which will be reflected in the monthly pre-billing statement emailed to the PI.
PIs can help one another by making a booking on a cancelled slot from another PI. In CALPENO, the project booker can display all cancelled bookings on the booking calendar, allowing the booker to quickly identify cancelled slots (Go to Calendar/Click Status from the left Menu/Check Cancelled).
How do I check my project's pilot hour balance?
All users associated with a pilot hour (PH) earning project can check the project's PH balance.
Use the steps below to check your balance:
- Login to your CALPENDO account
- Click on 'Projects' and 'My Projects' from the top menu items
- You will see a complete list of all the projects you are associated with
- The PH balance for the project is displayed in the table (see Pilot Hours Remaining column)
Please check to make sure that you have enough PH balance before making a booking with your pilot hours. Otherwise, CALPENDO will trigger an error and your booking request will be denied.
Back to TopReferences
- Watch this video for a quick demonstration of how to create bookings in Calpendo